NEW PICTURE: DISCO MMA
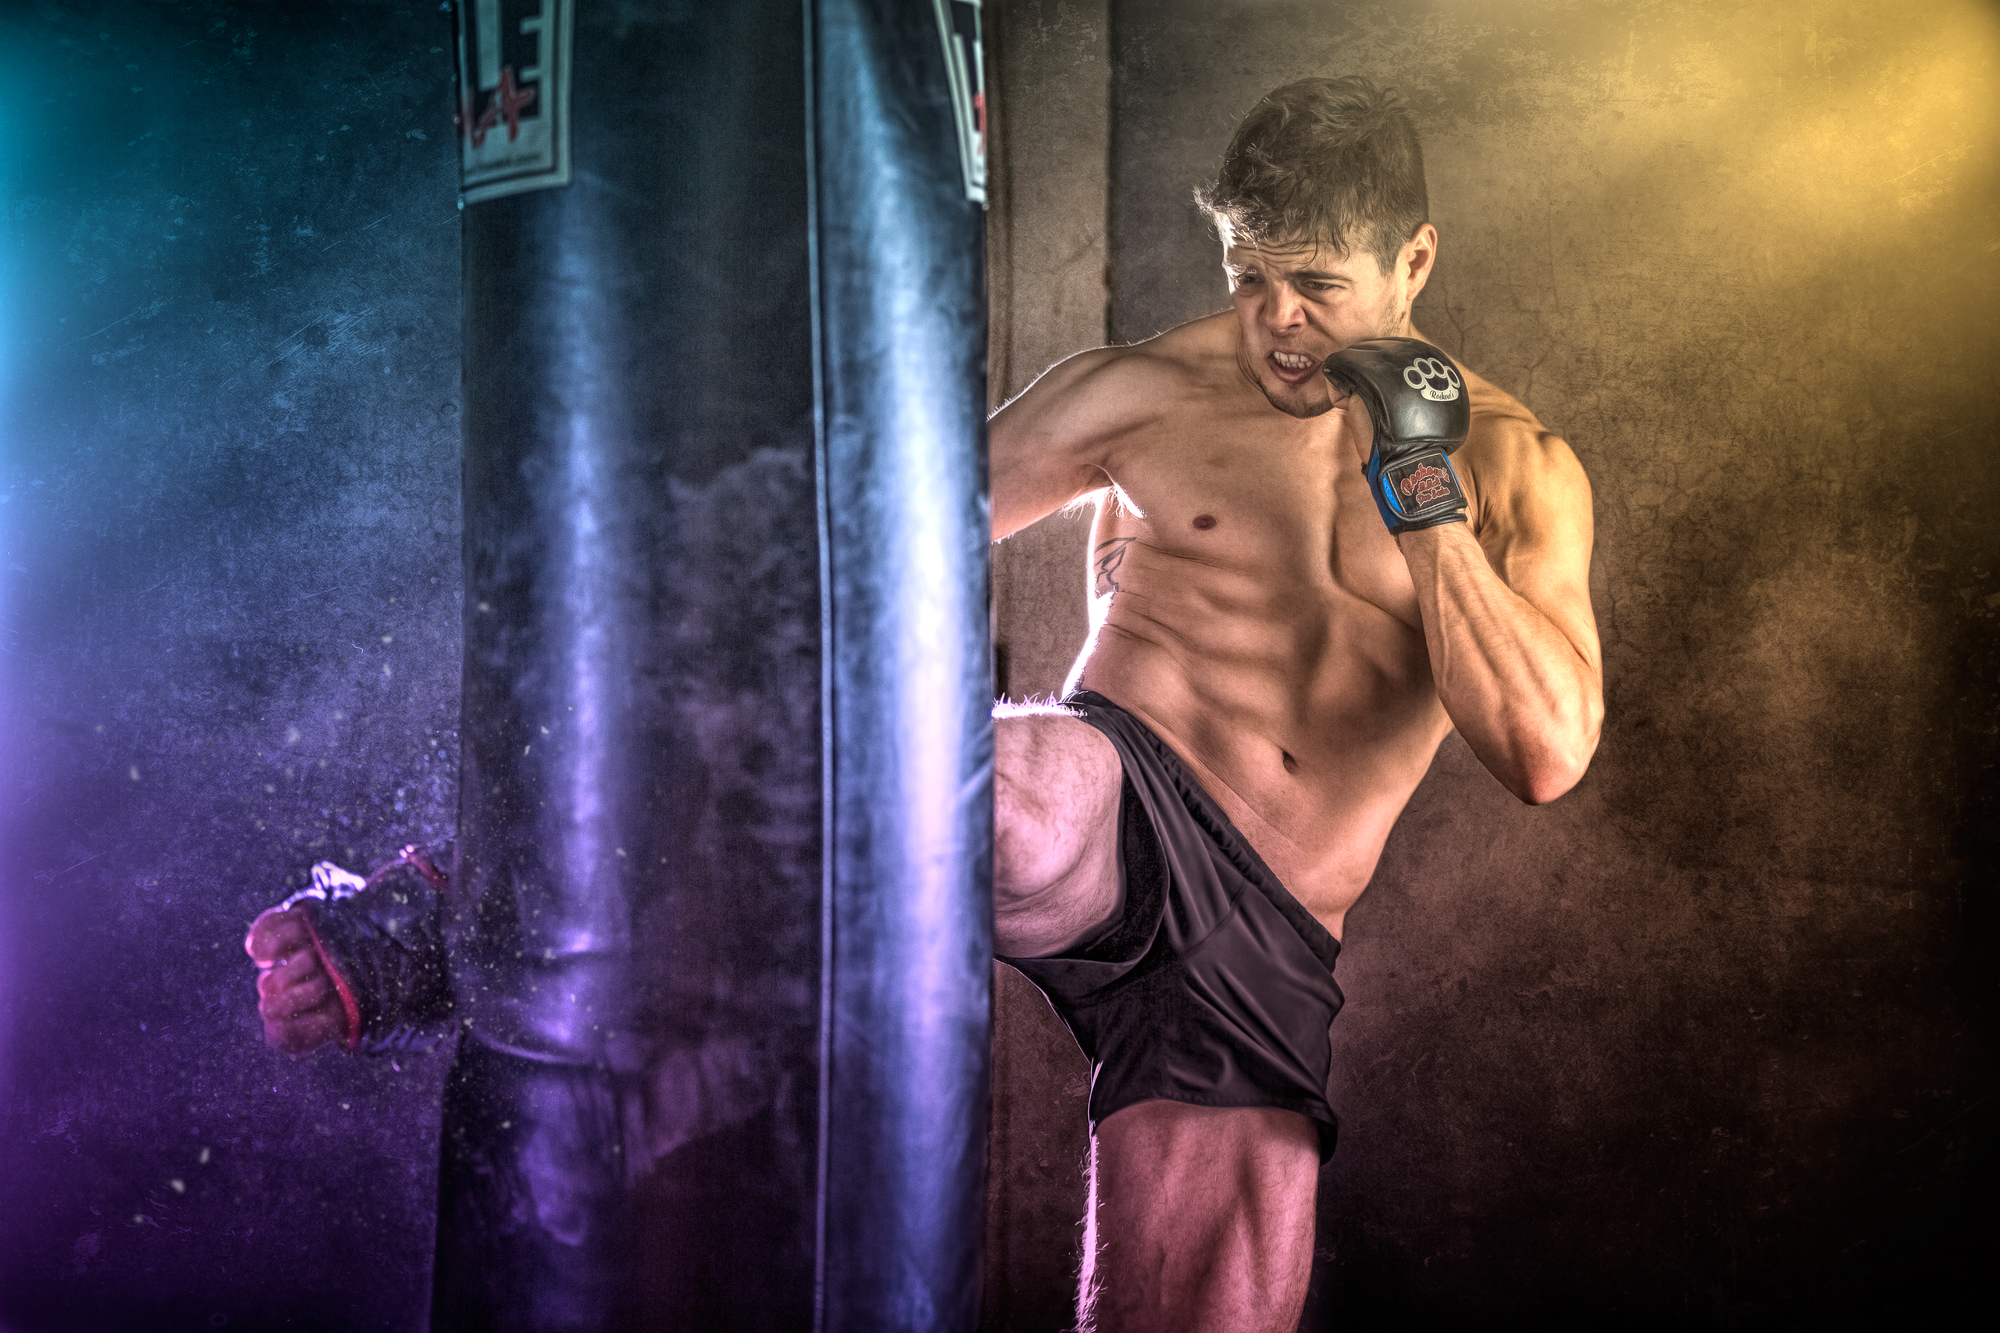
CAMERA SETTINGS: ISO 250, F/2.8, 1/250th
Hey folks! Once again, great positive feedback on my recent MMA shoot with Robby, and a lot of folks reached out wanting me to dive deeper into this image. I'm going to do the best I can to explain the lighting setup and the edit. I'm not sure how technical I should be, so for those of you that read this, please leave me feedback in the comments on how I can improve. So with that being said... Let's dive in.
THE LIGHTING SETUP AND THE CAMERA

As you can see in the illustration above I had 3 Canon Speedlites with 3 different light modifiers. Let's discuss the Westcott 7' parabolic umbrella ($99) placement first. The reason the umbrella is in front of the subject is to feather the light onto the subject. When the light source is further away the light is much softer when it hits the subject. Next we have the Westcott 12x24 Strip ($150) placed more in the corner to provide some rim/edge lighting onto the subject. I'll admit the image was a little to hot (overexposed) for my taste on the edges, but I felt I could make it work in post. Last but not least is the Rogue 3-in-1 Grid attachment ($40). The purpose of the grid was to backlight the punching bag in a way that could give detail to the dust coming off of the bag. Using a speedlite with this grid attachment rocks, I highly suggest trying it when you want to point light at something. I appreciate the spread of light vs a snoot which can be more direct. One additional thing to note, I set the zoom on the 2 rim lights to 200mm so the light didn't spread as much and was more direct.
Camera settings were ISO 250, F/2.8, 1/250th. I started out on High Speed Sync (HSS) with the lights but then dialed it within my cameras capability to handle flash without sync... Quick note, I forgot to turn off the HSS :) Moving on! I used the Canon 70-200mm F/2.8 with my Canon 5D Mark III tethered to my computer. I always shoot tethered when doing any kind of commercial shoot. I highly recommend it. Looking at the computer screen vs the small display on the back of a camera can go a long way. The areas that need fixing or an object that needs to be removed is much more visible when shooting tethered.
THE EDIT
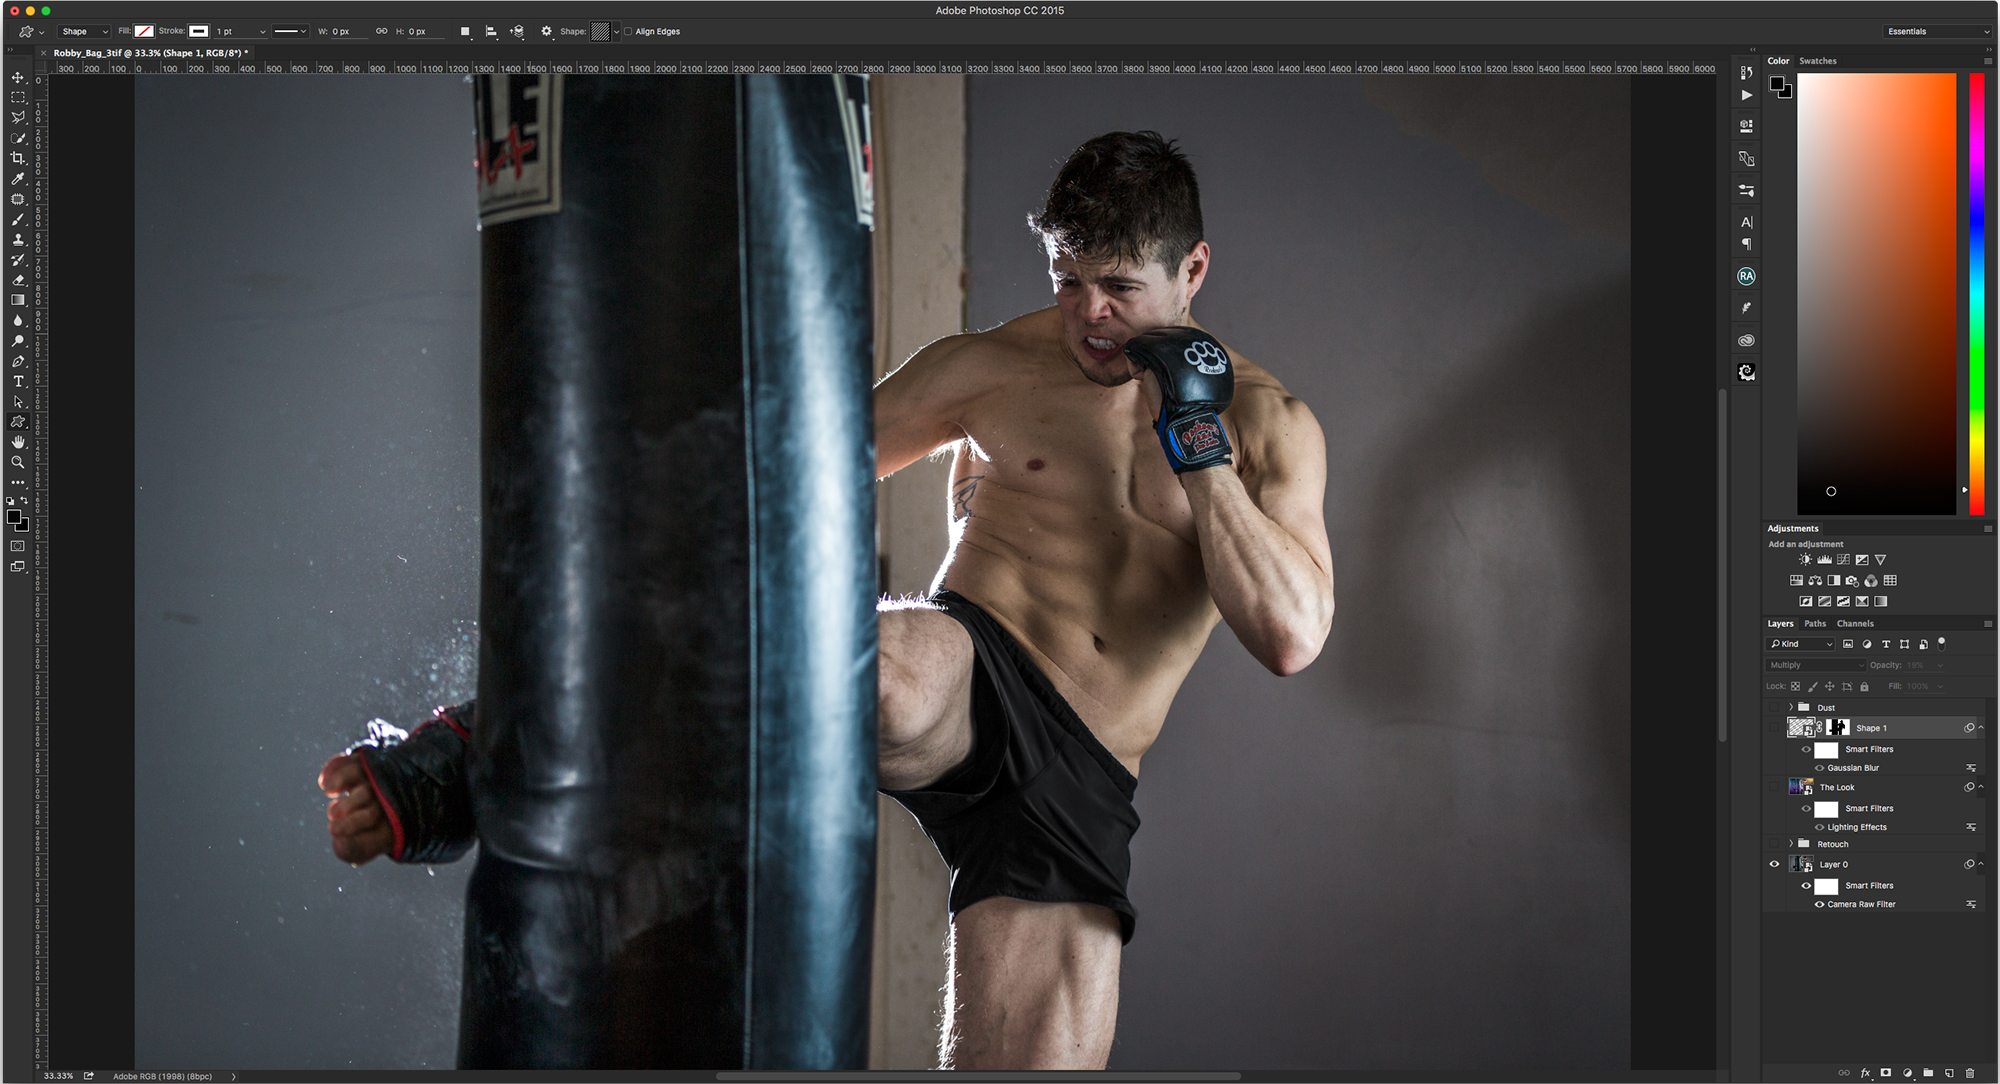
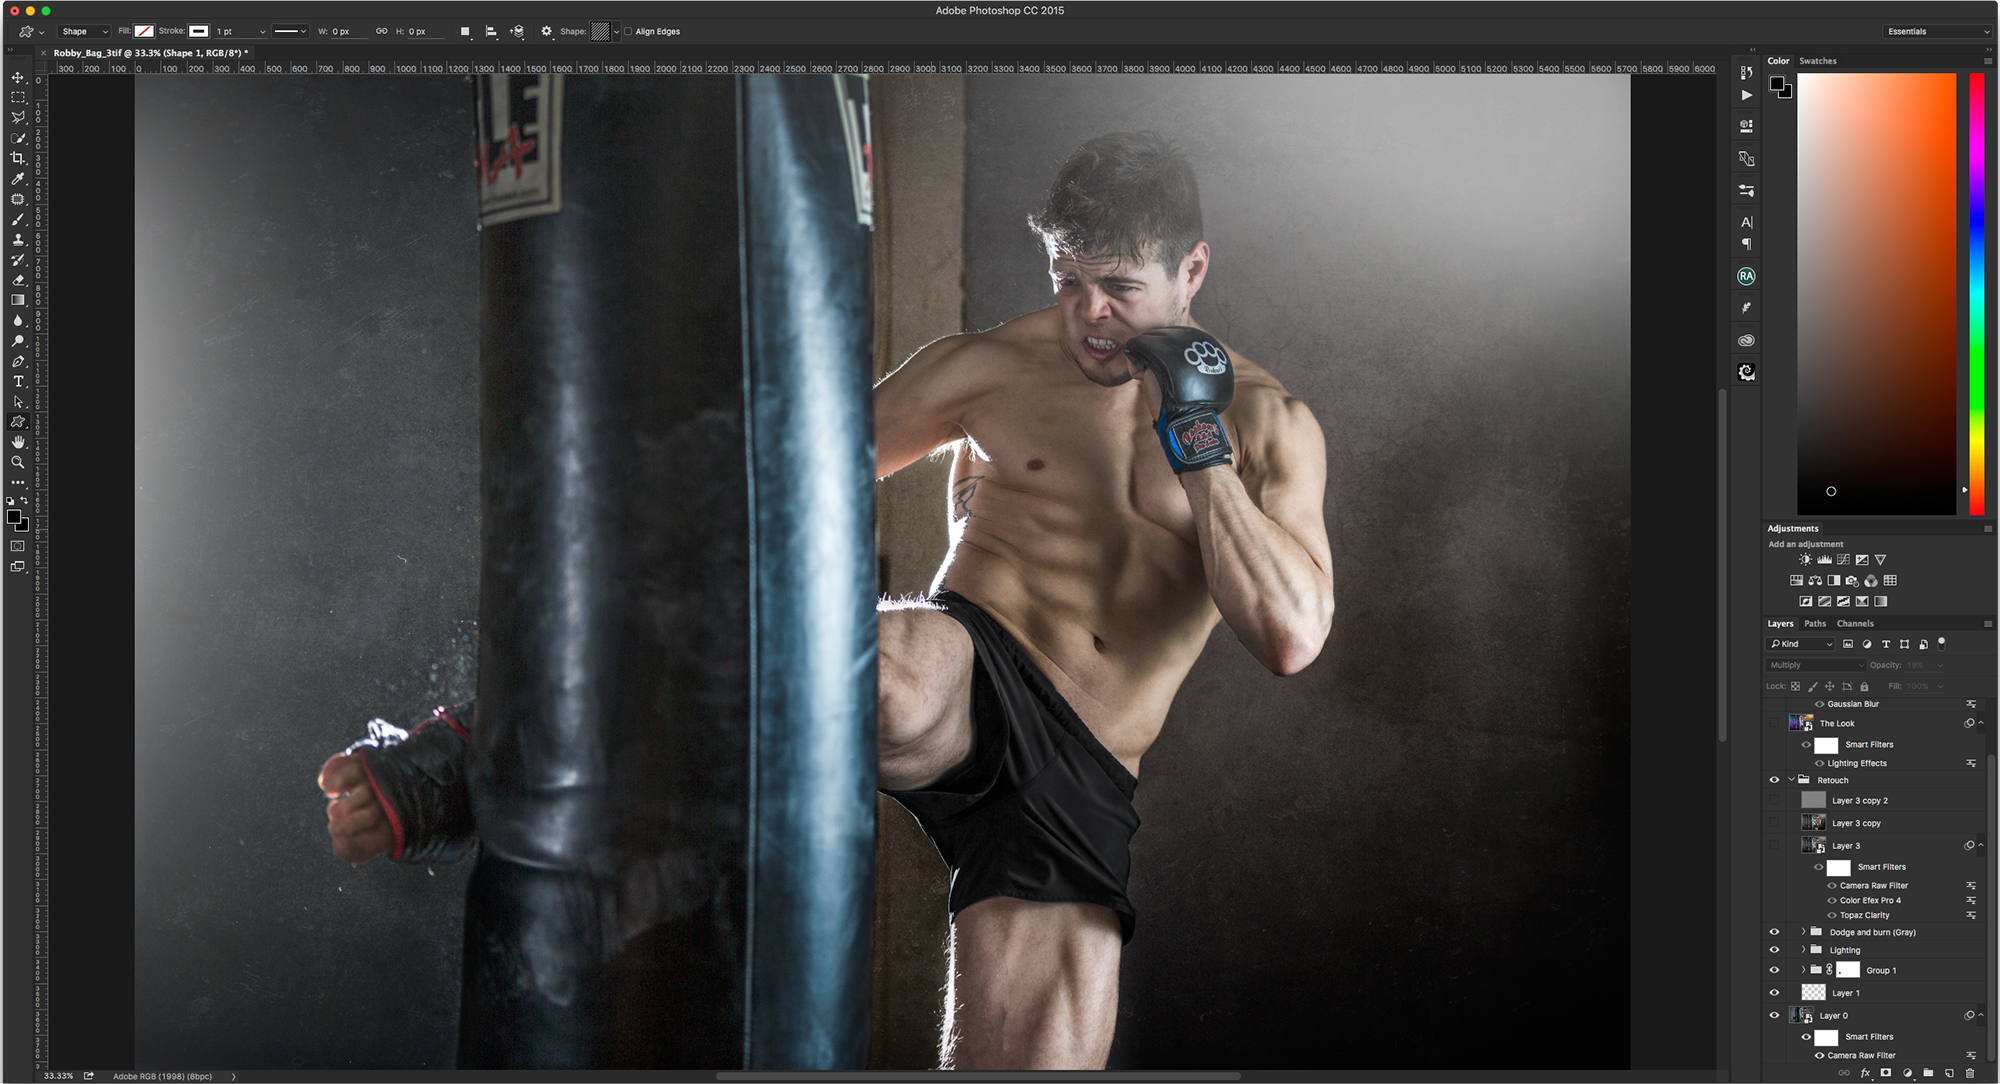
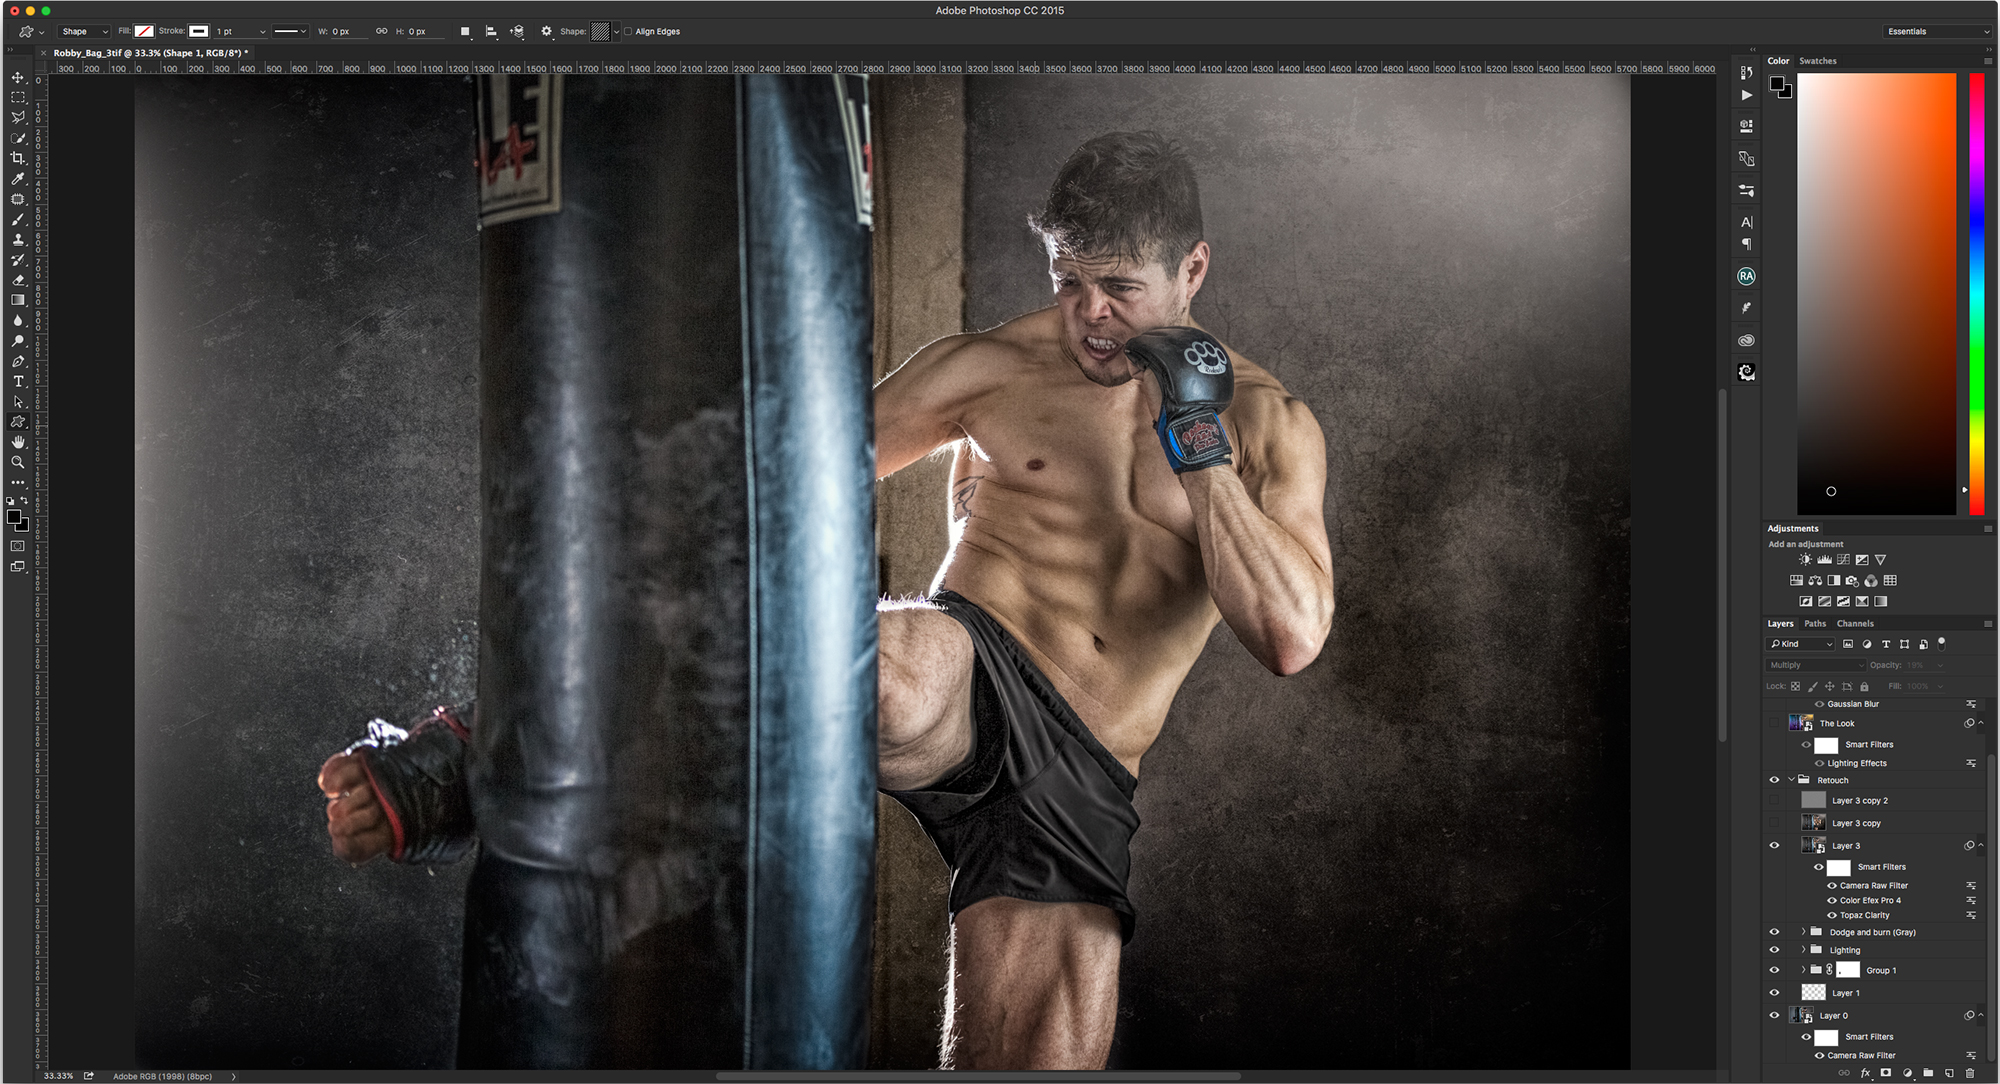

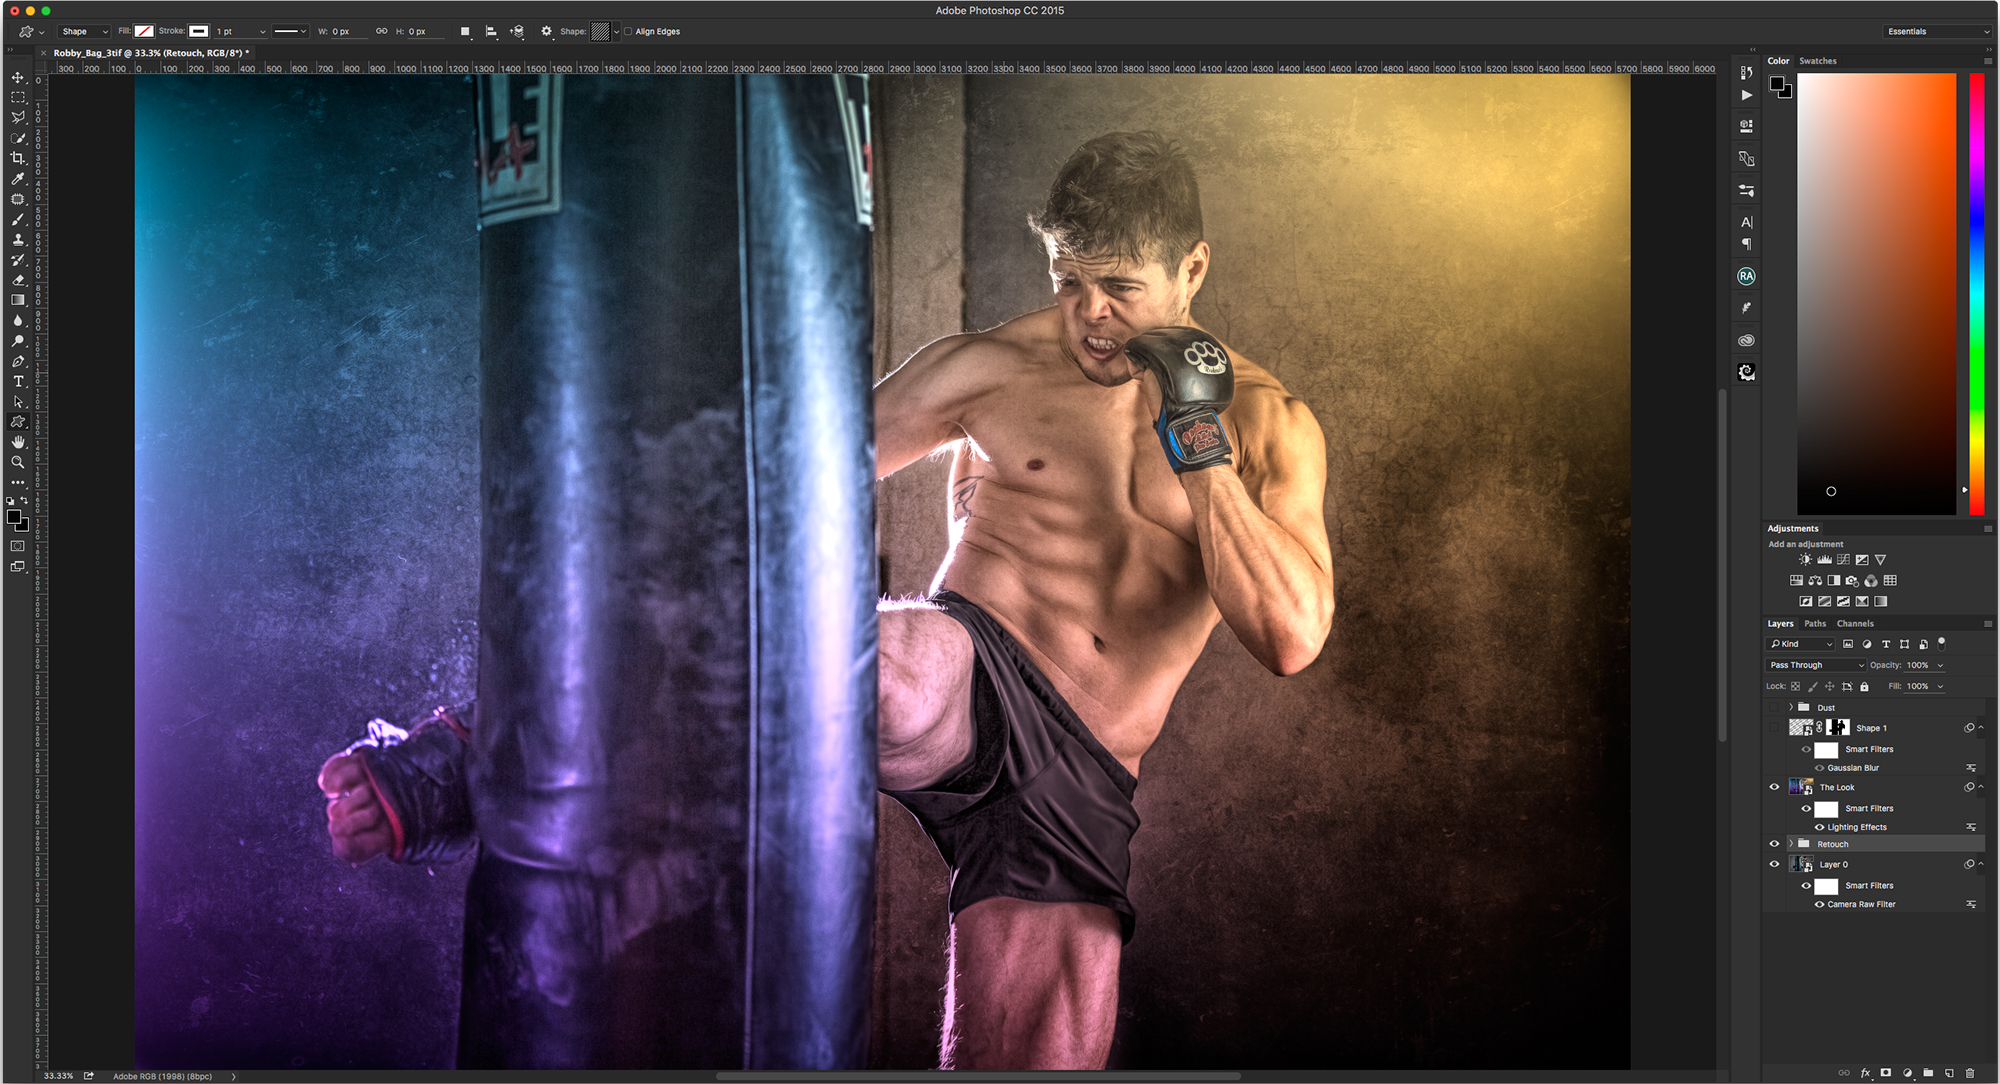


Ok, I broke down the image into 9 parts and just want to give a brief overview of each step. In the slideshow above, the images are in order of steps. I start with the out of camera shot and end with the finished product. I usually start in Lightroom CC, do a few minor adjustments, and then migrate into Photoshop CC where I do all of the heavy lifting. With that being said, I will give a brief overview of my process.
REPAIR
The first part of the process for me usually starts with Healing and Cloning. I always work non-destructively, meaning, I usually don't ever work right on the image layer, I create new layers above the image layer. Anytime I heal or clone I create a new layer and make sure that all layers are sampled so I can move around the information I need to. So, pretty basic, I remove things I don't want. In this case the subject had birthmarks on his chest and and arms, so I removed them. The wall was a real sore spot for me, I wanted to improve the look of it, so I overlayed some textures on the wall and used blend modes to blend the images together.
EXTRA LIGHTING
You'll notice that on the left and right side of the image I added some highlights. Super easy to do. Check this out. Add a new layer, take your paint brush (50 pixels) and just dab a few times on new layer, transform the object to be bigger and change the blend mode to Overlay or Softlight. You can now move the object where ever you please and reduce opacity and such as needed. Its a great light source!
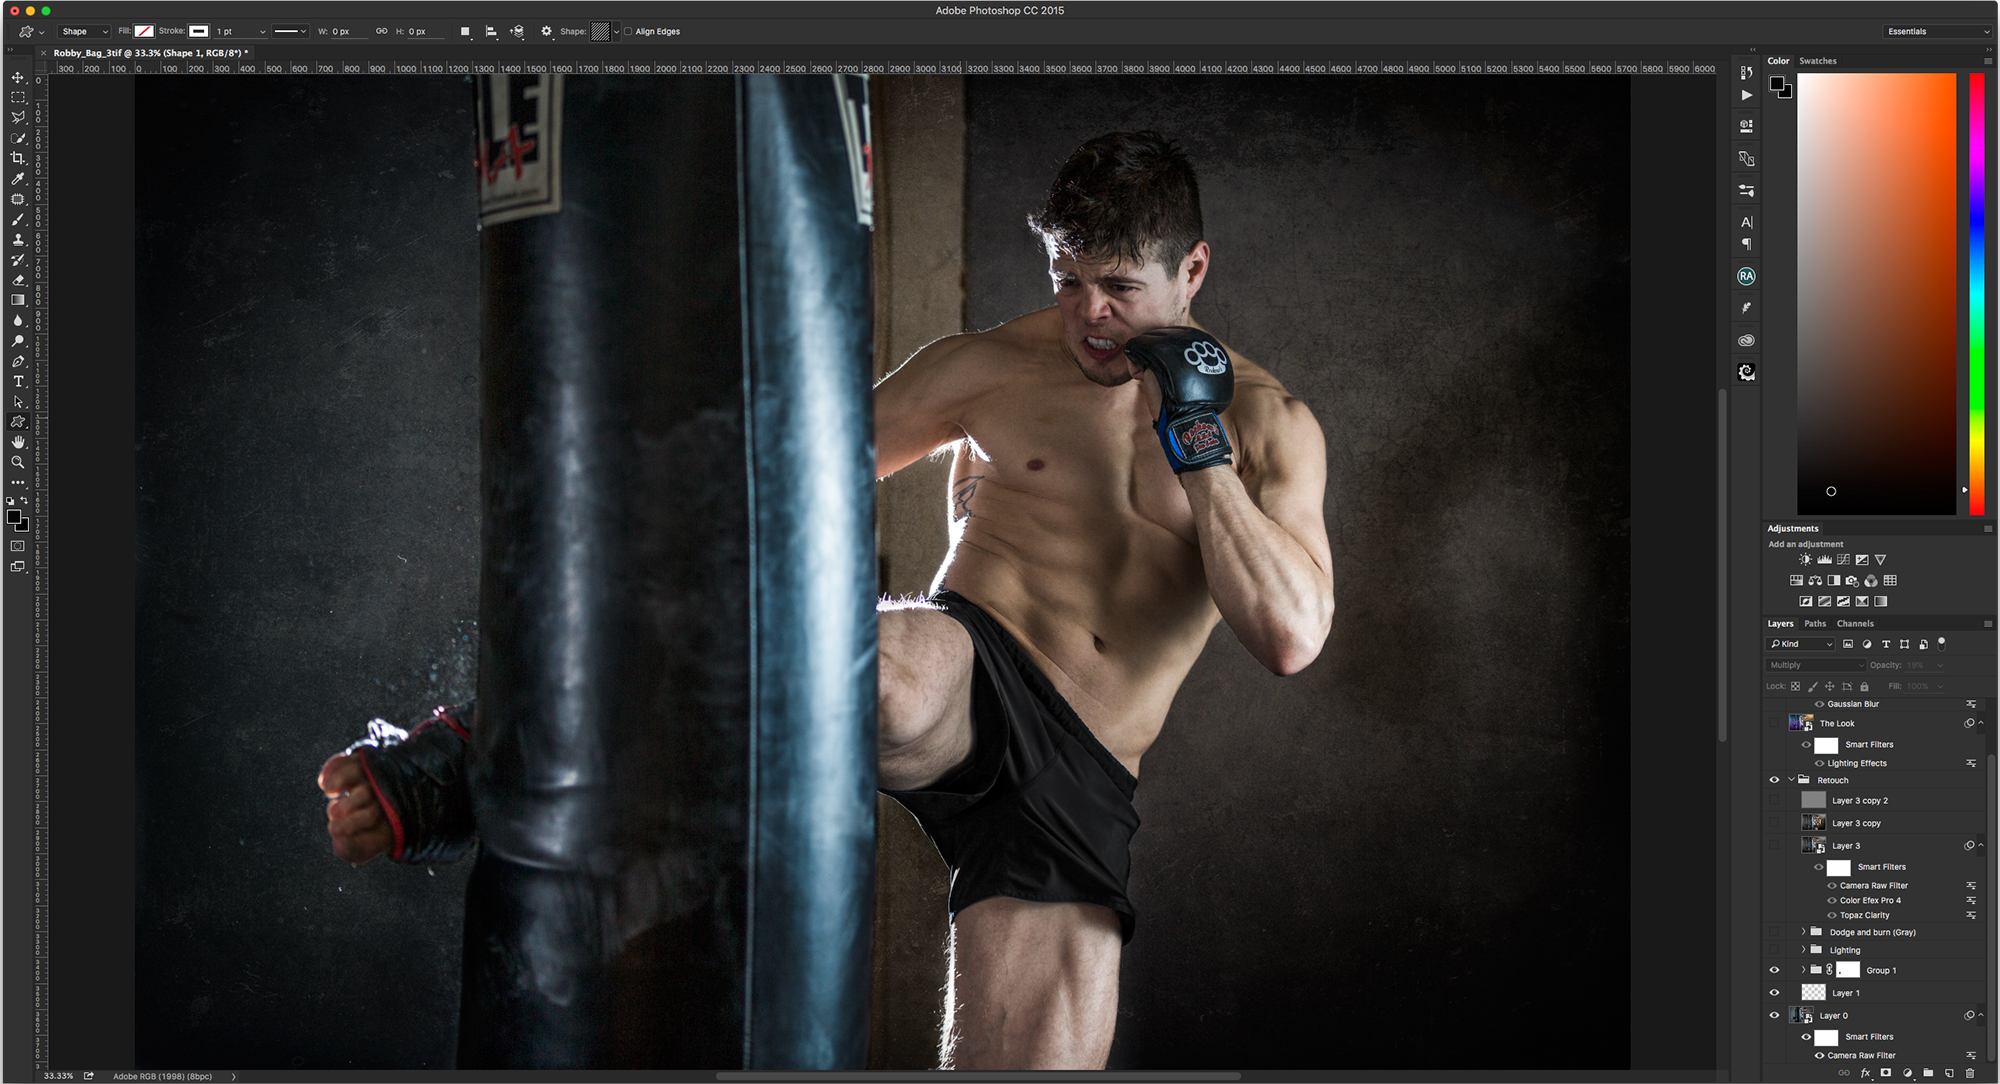
DODGE AND BURN
Dodging and burning can be a somewhat advanced technique, so I will be very brief here. I simply create two 50% gray layers right on top of each other, and set one blend mode to Softlight, and one blend mode to overlay. I will then use the dodge and burn tool on those layers at the midtones settings at 15% opacity. The goal here is to make lights lighter and darks darker. Contouring, light shaping, whatever you want to call it, I love it and highly recommend trying it.
PLUG-INS (NIK COLOR EFEX PRO 4 & TOPAZ CLARITY)
So, here's a little secret. I USE PLUG-INS!!!! Everyone is doing it! Why not!?! Its easy, fun, and fast. Nik Software has an amazing collection of tools and so does Topaz Labs. Check them out.
REDUCE NOISE AND HIGH PASS FILTER
At this point the image can get a bit grainy at times, so I use a technique I learned from Glyn Dewis called the "cartoon effect". Its pretty simple. Create a "copy merged" layer (combine all layers into one without flattening) and then duplicate that layer two more times. Turn off the most top layer that you just duplicated and select the layer underneath. Go into Filter>Noise>Reduce Noise and put the strength at 10 and zero out the other options. Now that part is done. Turn on the layer above and again go to Filter>Other>High Pass and set the pixels to 1.2. You will get a completely gray looking layer with a slight outline of detail. Change the blend mode to Overlay and watch details come back into the image.
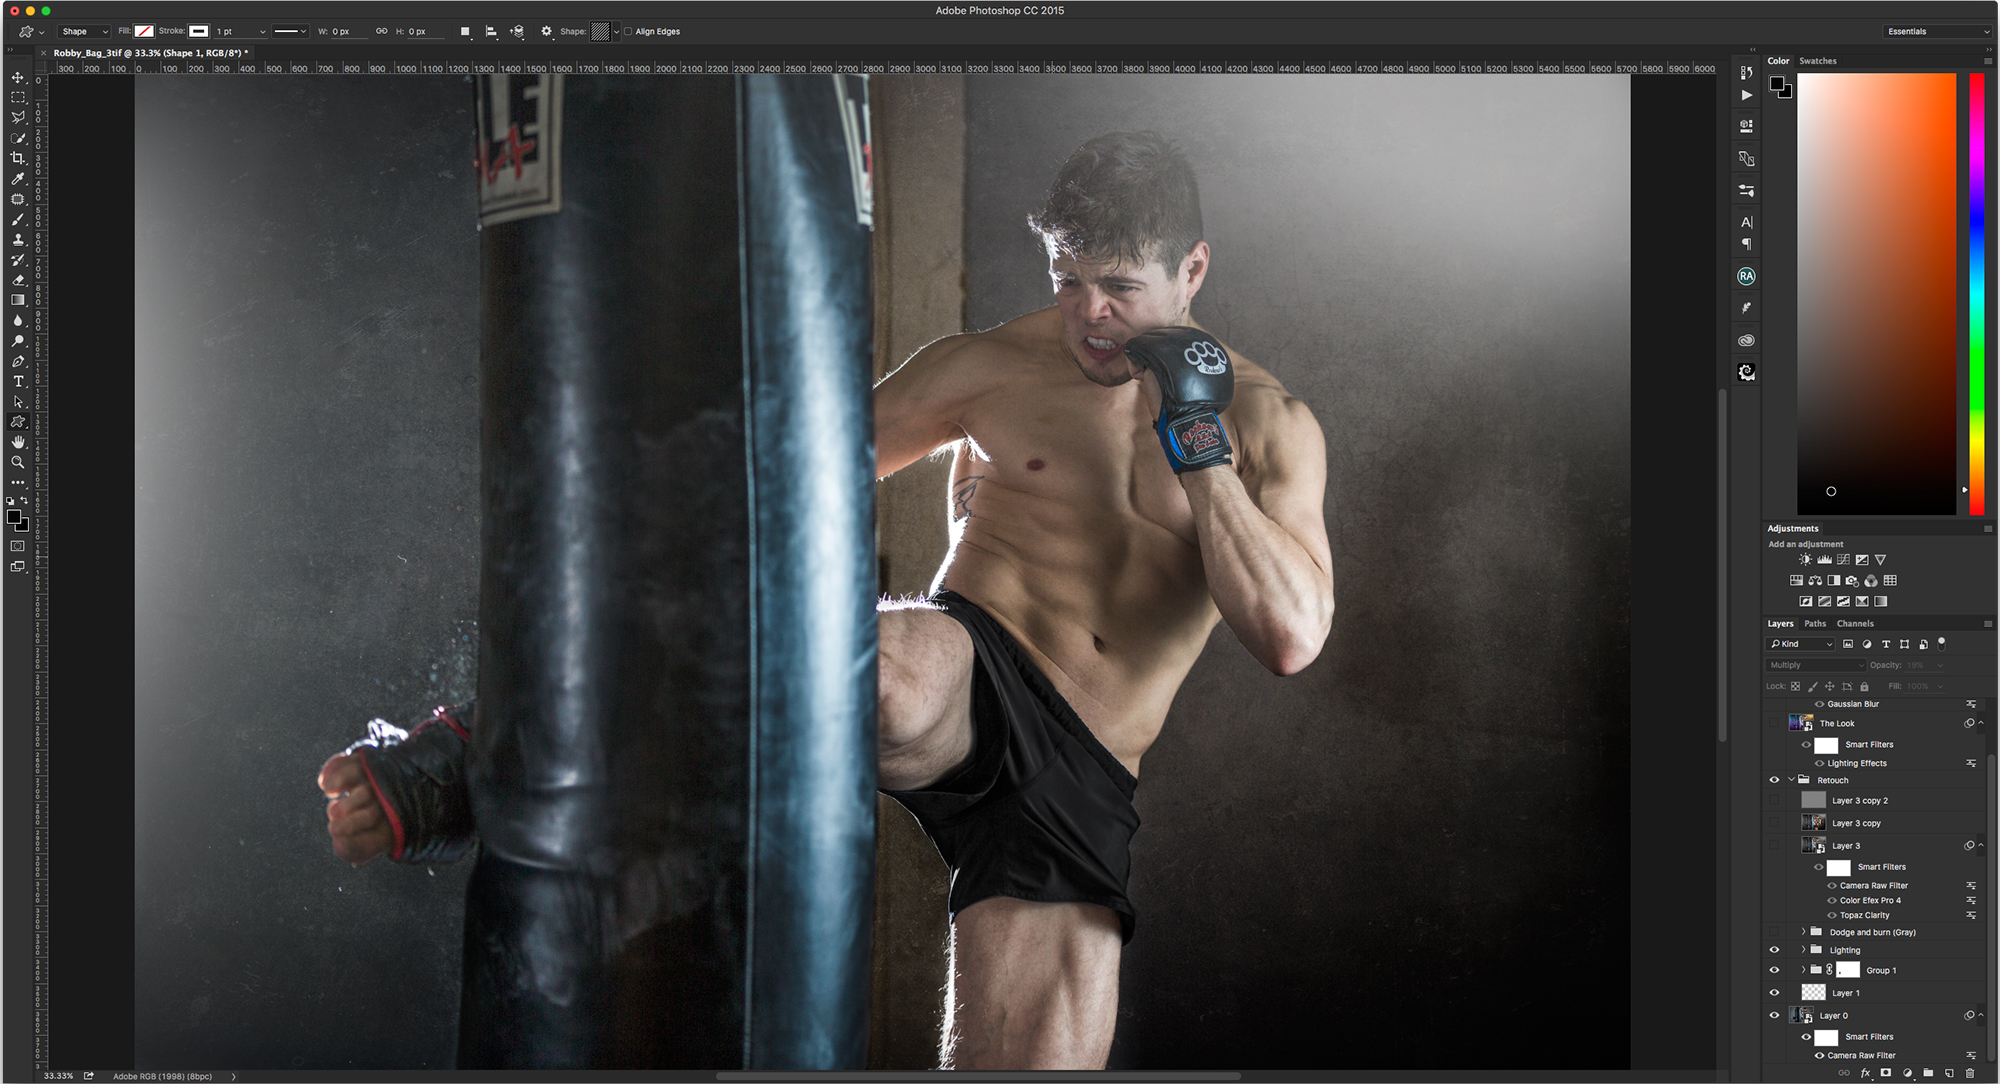
LIGHTING EFFECTS
In each corner of the image you will notice a different color. I used a filter called Lighting Effects. You can find this filter in Filter>Render>Lighting Effects. All I did is add 4 lights, one to each corner and changed the color of them. That's it! Pretty simple! You'll have to go into the filter to understand it. I suggest checking it out.
SHADOW ON THE WALL

This is a super easy trick. Use the Custom Shape tool in PS, choose the shape that has diagonal lines, stretch to fill entire canvas, change the blend mode to Multiply and Gaussian blur the layer to your taste, I think I did like 15 pixels and reduced the opacity to 30%. I had a Mask selection I used to remove the shadows on the subject.
THE FINAL IMAGE
At this point I usually walk away to clear my head for like 10-15 min. I find that by stepping away, it helps my process to see things I may have over looked or to just clear my head of bad ideas. But, at this point I simply just play around. I'll try a few things to see how well they work. If I feel it works, I'll let it stay. I really just fine tune the details and try to add things that will create additional interest.
Whew! That was a lot to take in. I hope I provided some clarity and direction. I also greatly appreciate all the folks who read this and continue to provide feedback to me. As always, if you have any questions, please reach out.
Best,
Jon