New Picture: Yoga & MMA Training

Hey all! I've been getting a lot of positive feedback on this picture I've posted and wanted to to share with you how I went about capturing and retouching this image.
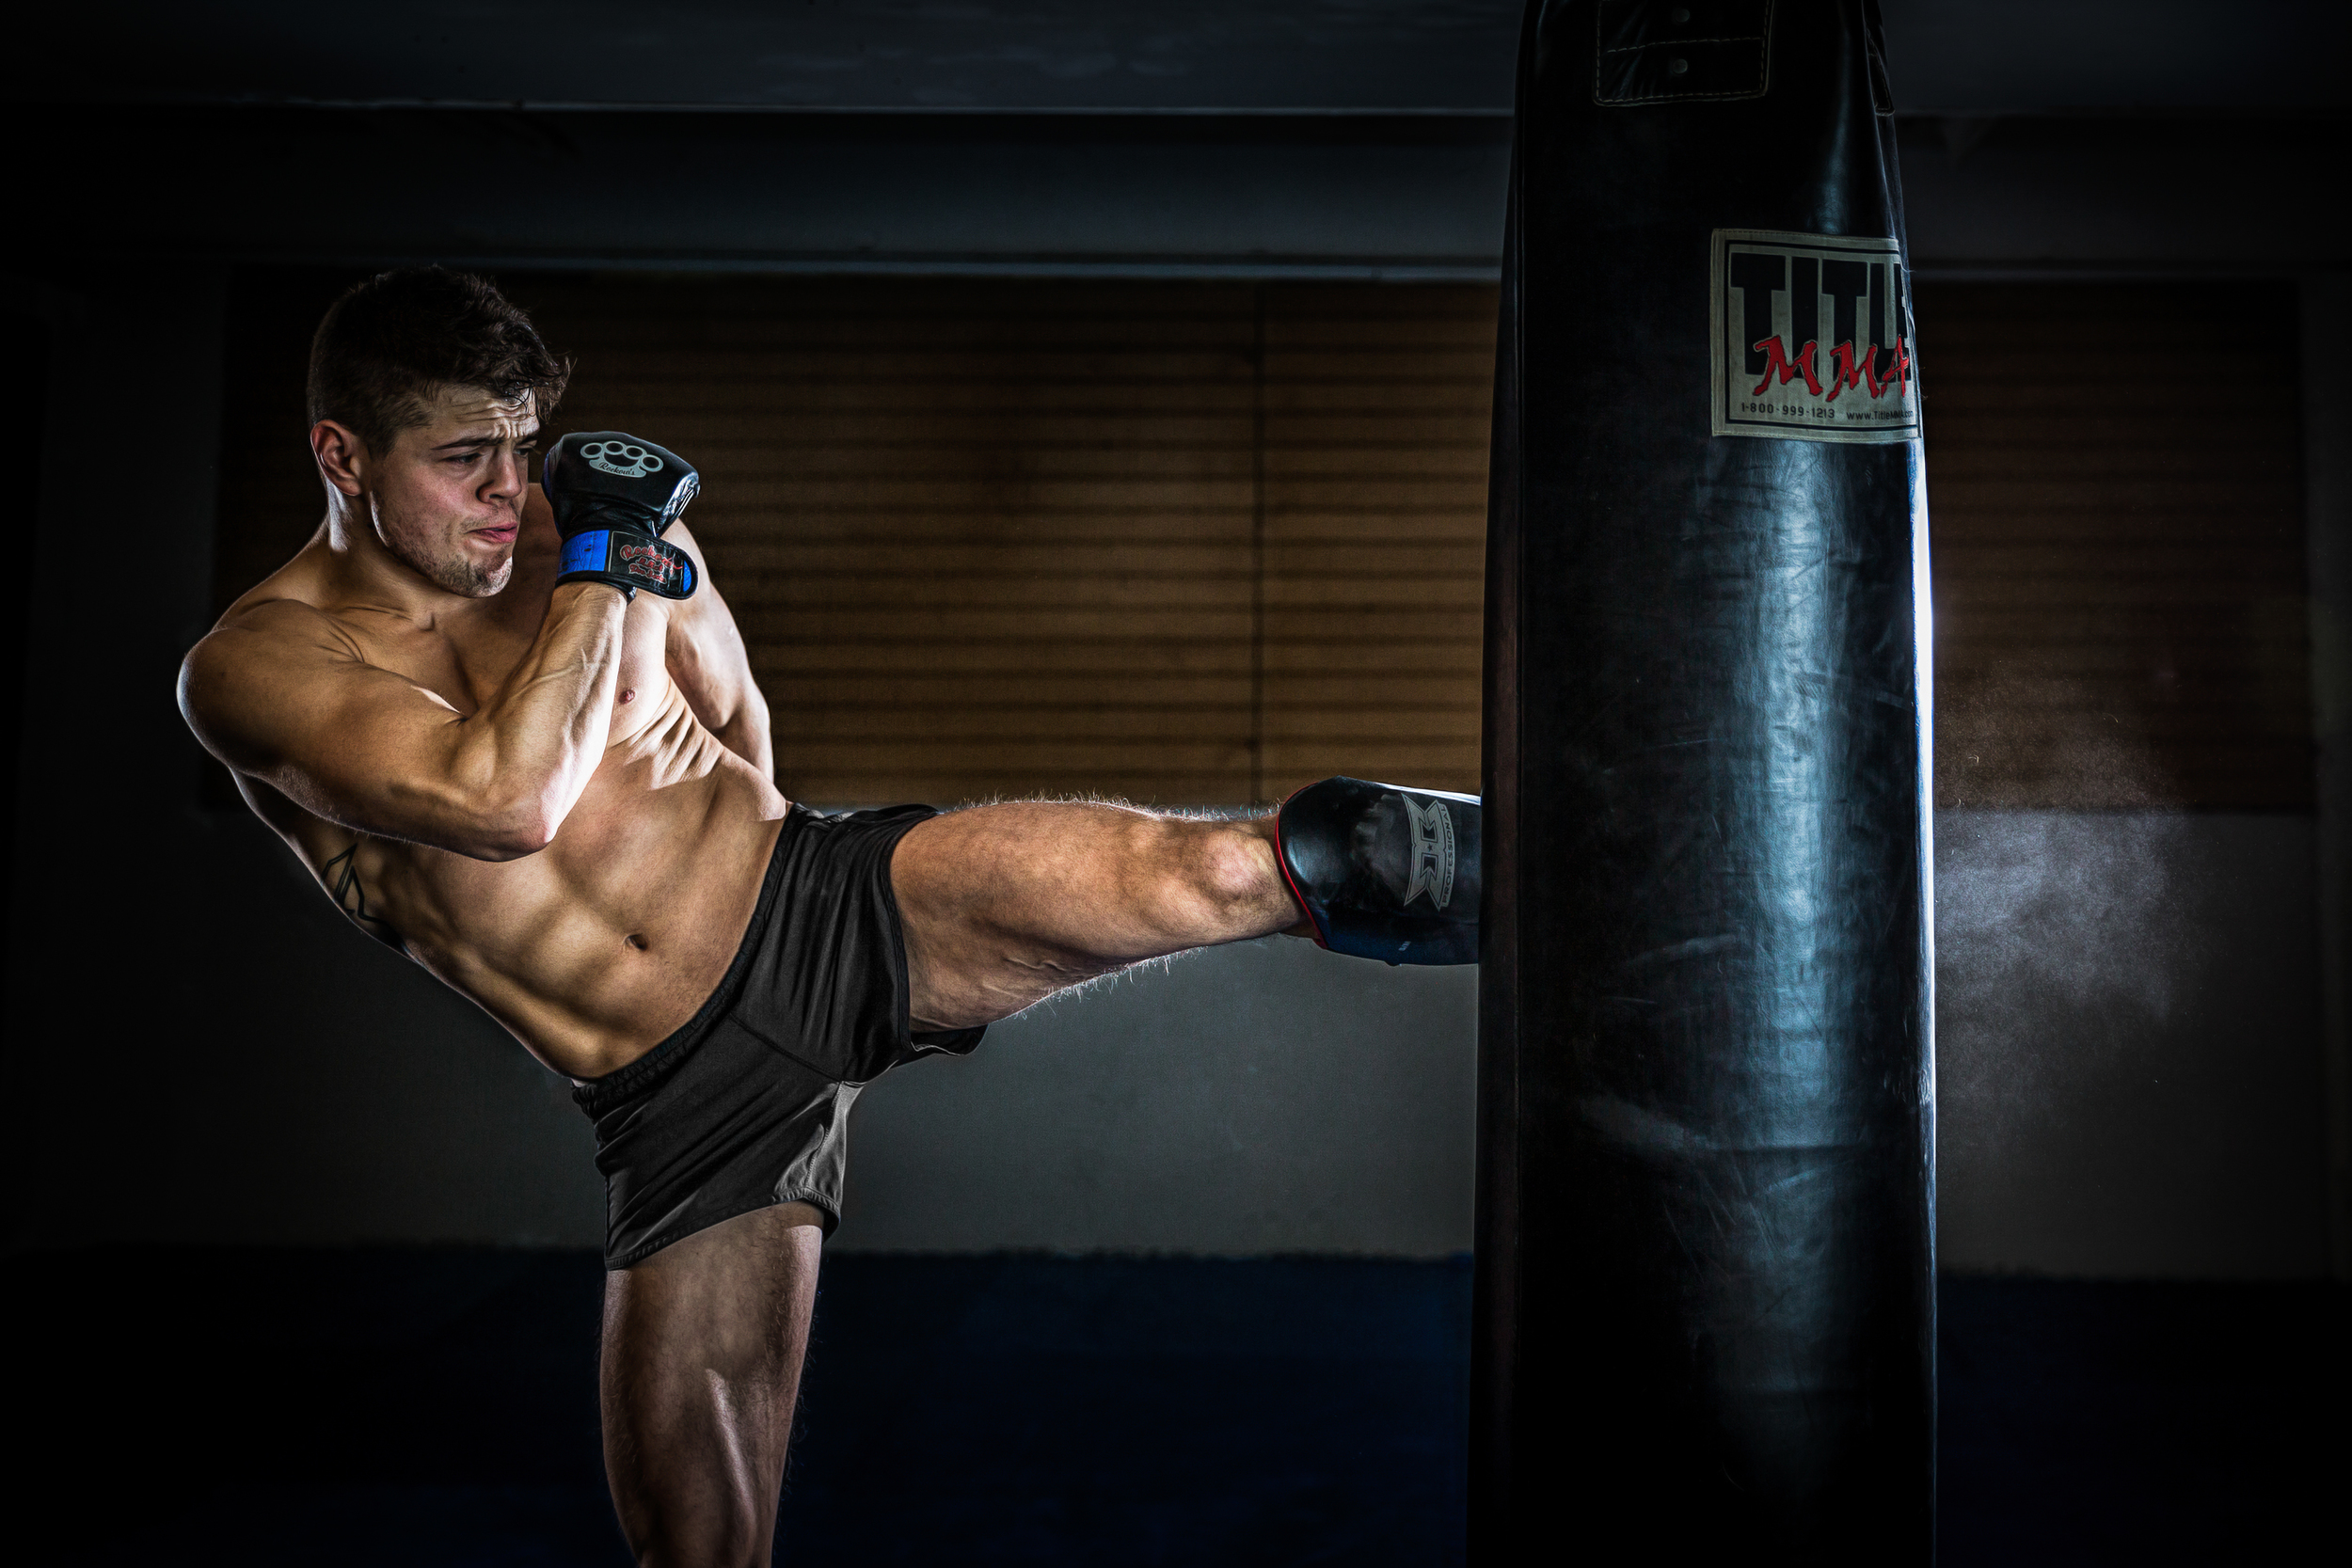
The Lighting Setup
3 Canon 600EX speedlites with the canon transmitter. The light modifiers I used was 1 - 12x24 Westcott strip modifier, 1 - Rogue 3-in-1 Flash Grid and my key light was 1 - 7' parabolic Westcott umbrella with a diffuser. The 12x24's purpose was to create a nice rim light on his backside which was achieved. The grid's job was to send light more directly to the bag and back of the subjects leg to highlight his body and the dust. The key light was positioned at angle (see in photo gallery) so that the light could feather his front side vs being harsh. In the photo gallery is a diagram showing placement of the lights.
The Capture
Equipment used to capture this image was a Canon 5D Mark III with a 24-70mm F/2.8 lens. One thing to note is I was shooting tethered right into Lightroom CC. I highly suggest shooting tethered when possible, being able to see more on screen vs the back of the camera is a huge benefit. My settings were ISO 250, 1/160th, F/2.8. My focus was on the right side of his shin at the impact point on the bag so I could capture the dust coming off of the bag. I should probably add that that I put a generous amount of baby powder on the backside of the bag to simulate dust.
The Retouch
Pretty standard here. Did some minor adjustments in Lightroom CC with tones and lighting and then moved right on over to Photoshop CC where I did the heavy lifting. I removed unwanted items and did a healthy dose of dodging and burning. Once that part was over I applied some additional effects using Topaz Clarity and Nik Color Efex 4.
Once again, thanks for stopping by, and don't be afraid to reach out for any and all questions.
Best,
Jon